Project Description:
Project-lab (http://project-lab.herokuapp.com/) is my first web application based on MERN Stack. The purpose of this project is to make a backend abstract API Service, that will host all my APIs. Currently, Project-lab hosts the result of my npm package icsd-scraper. Users using this service (Project-lab) can get the results of this npm package.
With React.js as front-end an admin panel – dashboard has been crafted. Through this panel, users can create accounts to Project-lab service and by making “Apps” they can have access to the APIs.
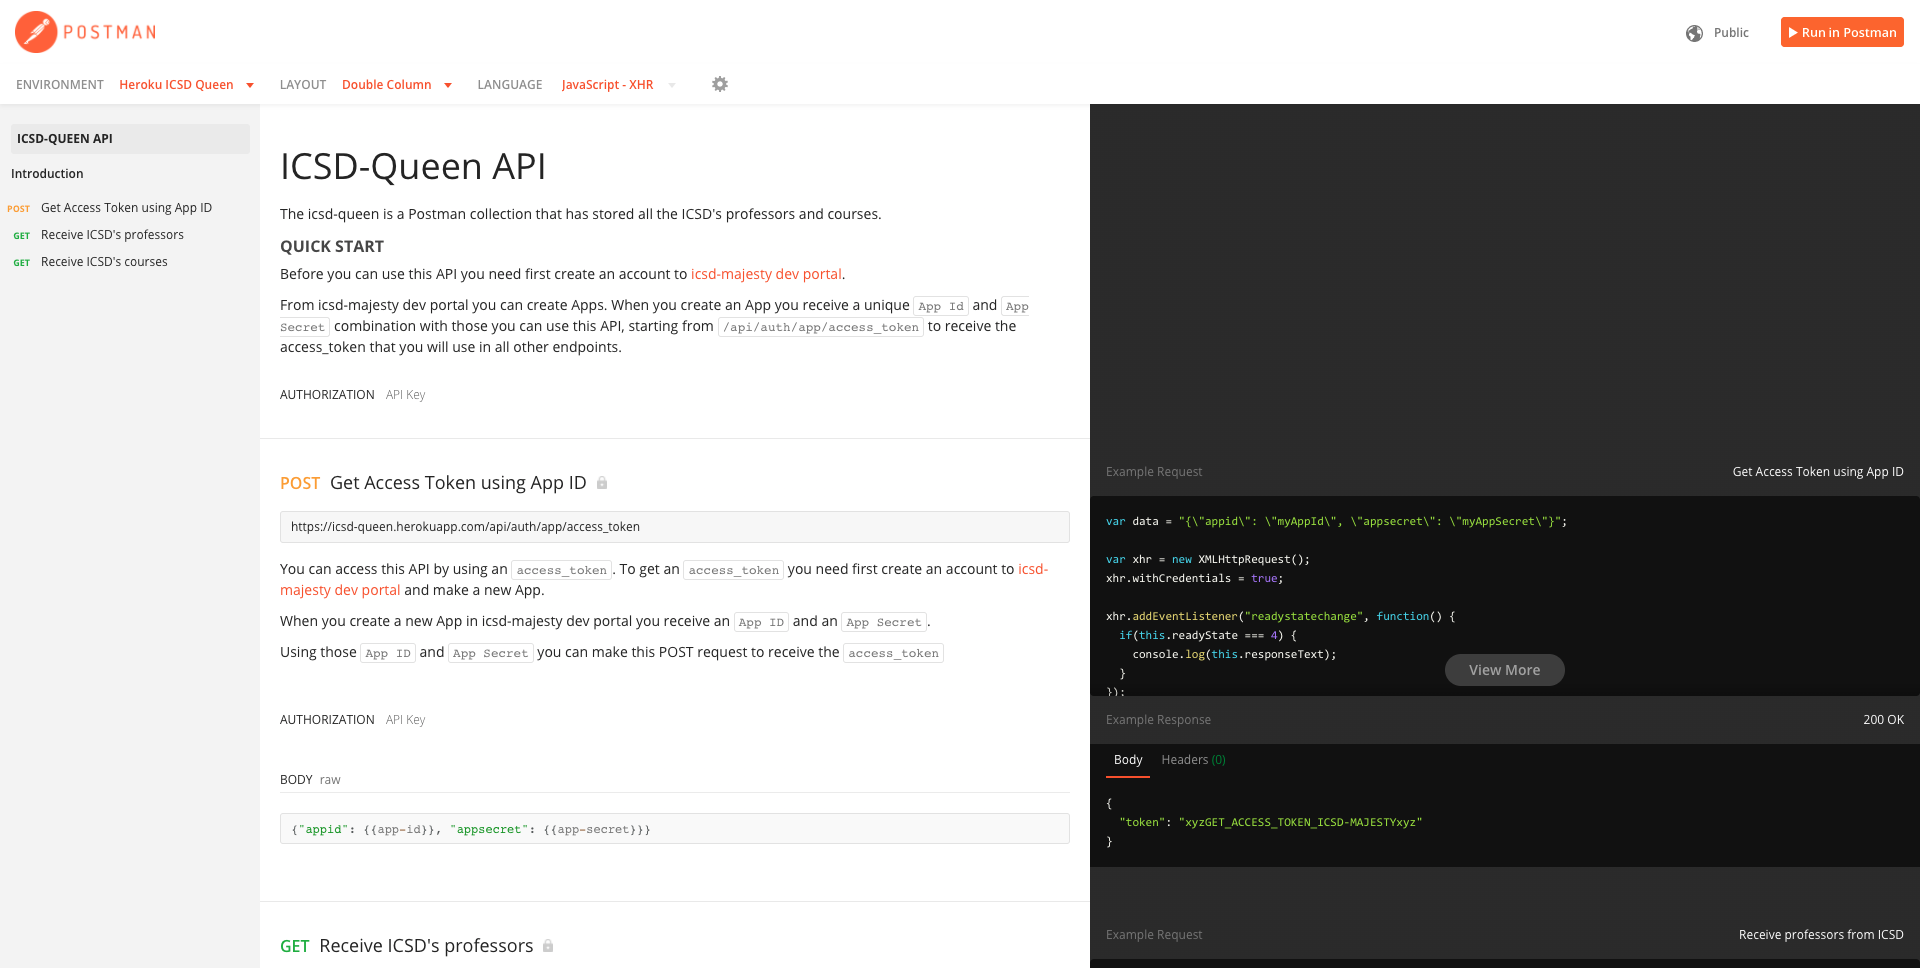
Alongside the front-end and backend, one more thing was left to publish my API. The documentation to describe the API Endpoints. For this task, Postman gave me a helping hand to achieve nice and helpful results for the end user. The process was really easy because during the development process I used constantly Postman collections to test my API, so with just a button away the docs has been generated and published. The API Documentations to use the icsd-scraper through Project-lab Service can be found here.
Currently for Public, the Beta version is released where users can only take advantage of the following account to browse and benefit some of the features of the Dashboard. The login credentials are:
- Username: [email protected]
- Password: demo123
The architecture
For this project has been used only JavaScript technologies based on MERN Stack.
- MongoDB: As database has been used the MongoDB (NoSQL Database) hosted on cloud.mongodb.com and for data manipulation purposes in Node.js backend system the mongoose driver give me a helping hand.
- Express.js: To write the server code, express – the most popular web framework for Node.js – has been used.
- React.js: Continuing from the front-end side, for the first time, I tried my skills to use React.js. The React.js is a popular JavaScript Library to build User Interfaces.
- Node.js: My favorite solution for building backend systems has been used. Node.js is a cross-platform runtime environment built on Chrome’s V8 JavaScript engine.
The Admin Panel – Dashboard
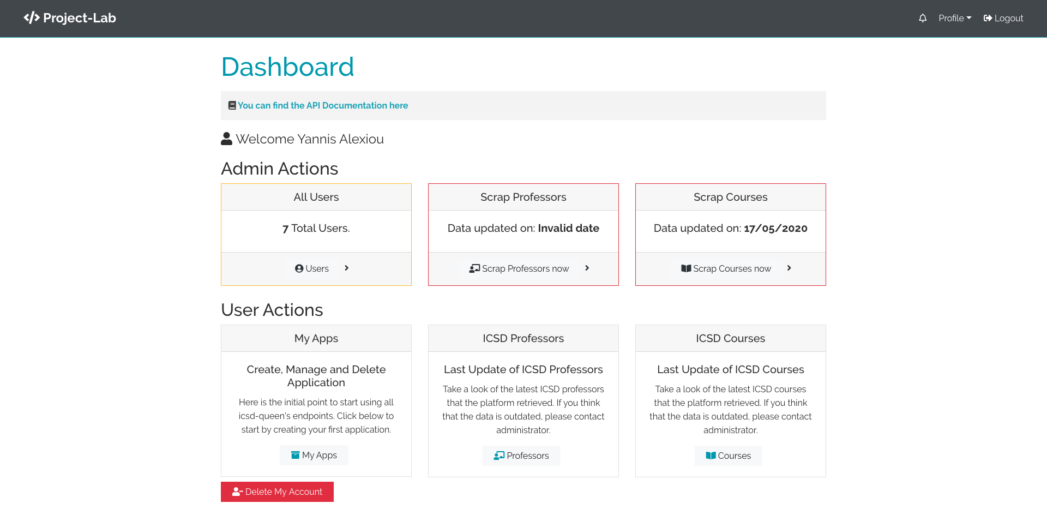
A User can create an Account to Admin panel through his GitHub account. Currently dashboard support two types of users. Developers and Administrators. Developers can make new applications, and browse throw API results. On the other hand, Administrators have all privileges from Developers as well as some more, to manage all user accounts of the platform, scrap new professors and courses.
Scraping ICSD through Dashboard
For scraping the ICSD site, the npm package icsd-scraper has been used. The administrators for the Dashboard has the role to update the data that API serves to the end users. Because of the nature of the scraping the results coming with latency. To achieve nice results they have been implemented two asynchronous methodologies. The ancient polling method and the more shining method using Socket.io.
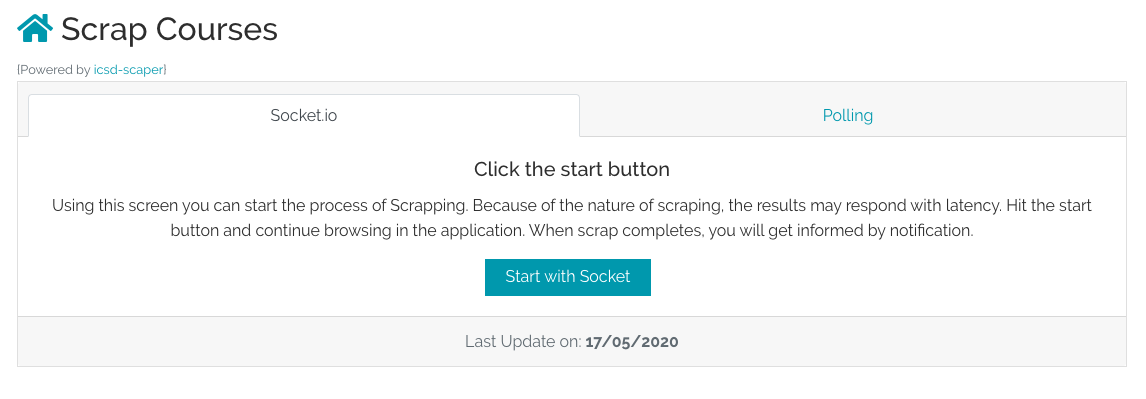
Socket.io: With the methodology of socket.io, user can get real-time results when data updates. When the Admin User start the process an event triggered to the server to update the data. The Admin User can continue browsing through the Admin Panel and when the data arrives, the Admin User informed by a new alert on the top of the Screen and a new notification coming to the notification center of the Admin Panel, so the Admin User knows that the data has been updated.
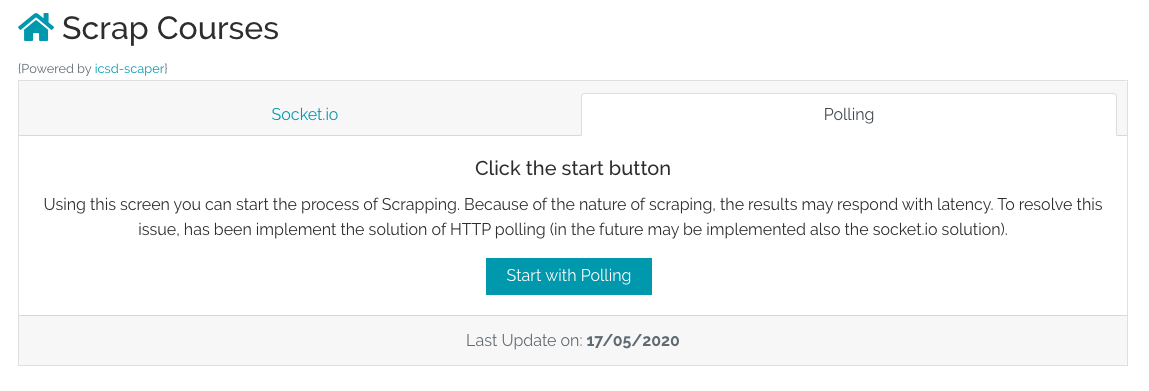
Polling: The Admin User, make a request for new (professors/courses) data and a new queue started on backend. The Admin User has the role to “ask” the backend for results updates. So when the Admin User start the polling method, a new button added to the screen which used to “ask” the Server, if the update job has been finished. When the Job is done, the user redirected to the updated results inside the Admin Panel.
Documentation
As searching for API Documentation solutions, I came across the Postman solution. While developing the Project-lab I used postman to test me API endpoints through some collections that I made.
When I found that I can make an API Documentation for free by tapping only one button I was curious to learn more. I was really excited how easy was it, so I use this solution and you can found the results here.
Project Structure
One of the things that I love most is crafting beautiful application from back to front. So I tried my best to achieve nice well read code by applying and use strict project architecture. In the images below you can see my folder structure of React and Node projects.
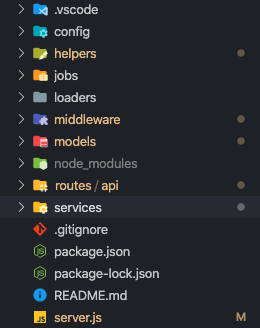
Node.js Project Structure
- Config, has all the necessary configuration for the (Heruku) host and backend system to run properly.
- Helpers, has all helped functions that used alongside the project. For examples, constants and default messages, object generators for some documentations, message responses templates for socket and more.
- Loaders folder contains the startup processes of the server split by modules. For example here you can found the mongoose startup module, passport and socket.
- Middleware has all the functions that used between some other functions. Here you can found for example the auth middleware that checks if the user is authenticated to let him continue to the API endpoint that has asked for or bring him back to login screen.
- Models folder contains all Databases’ models.
- Router is where all express route controllers for the API endpoints live.
- Services folder contains all the business logic that has been used.
React.js Project Structure
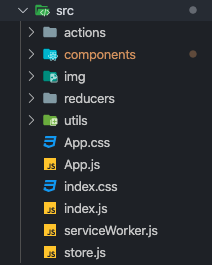
- Actions has all the necessary file that triggers the core communication within the front-end app to the backend system and returns the data back to the reducers to feed the state. All files here are separate it by the endpoint that they use.
- Components folder contains all views that has been created for the frontend application. They are pure as much as I can without any heavy logic and data manipulation.
- Img folder contains some static images that they used across the web application.
- Reducers is where all the data transformation happens. When the Actions bring the data reducers triggered to make the objects that can be accessed be state and feed the components.
- Utils contains some JavaScript helping files for example the socket initialization file and some user authentications files.
